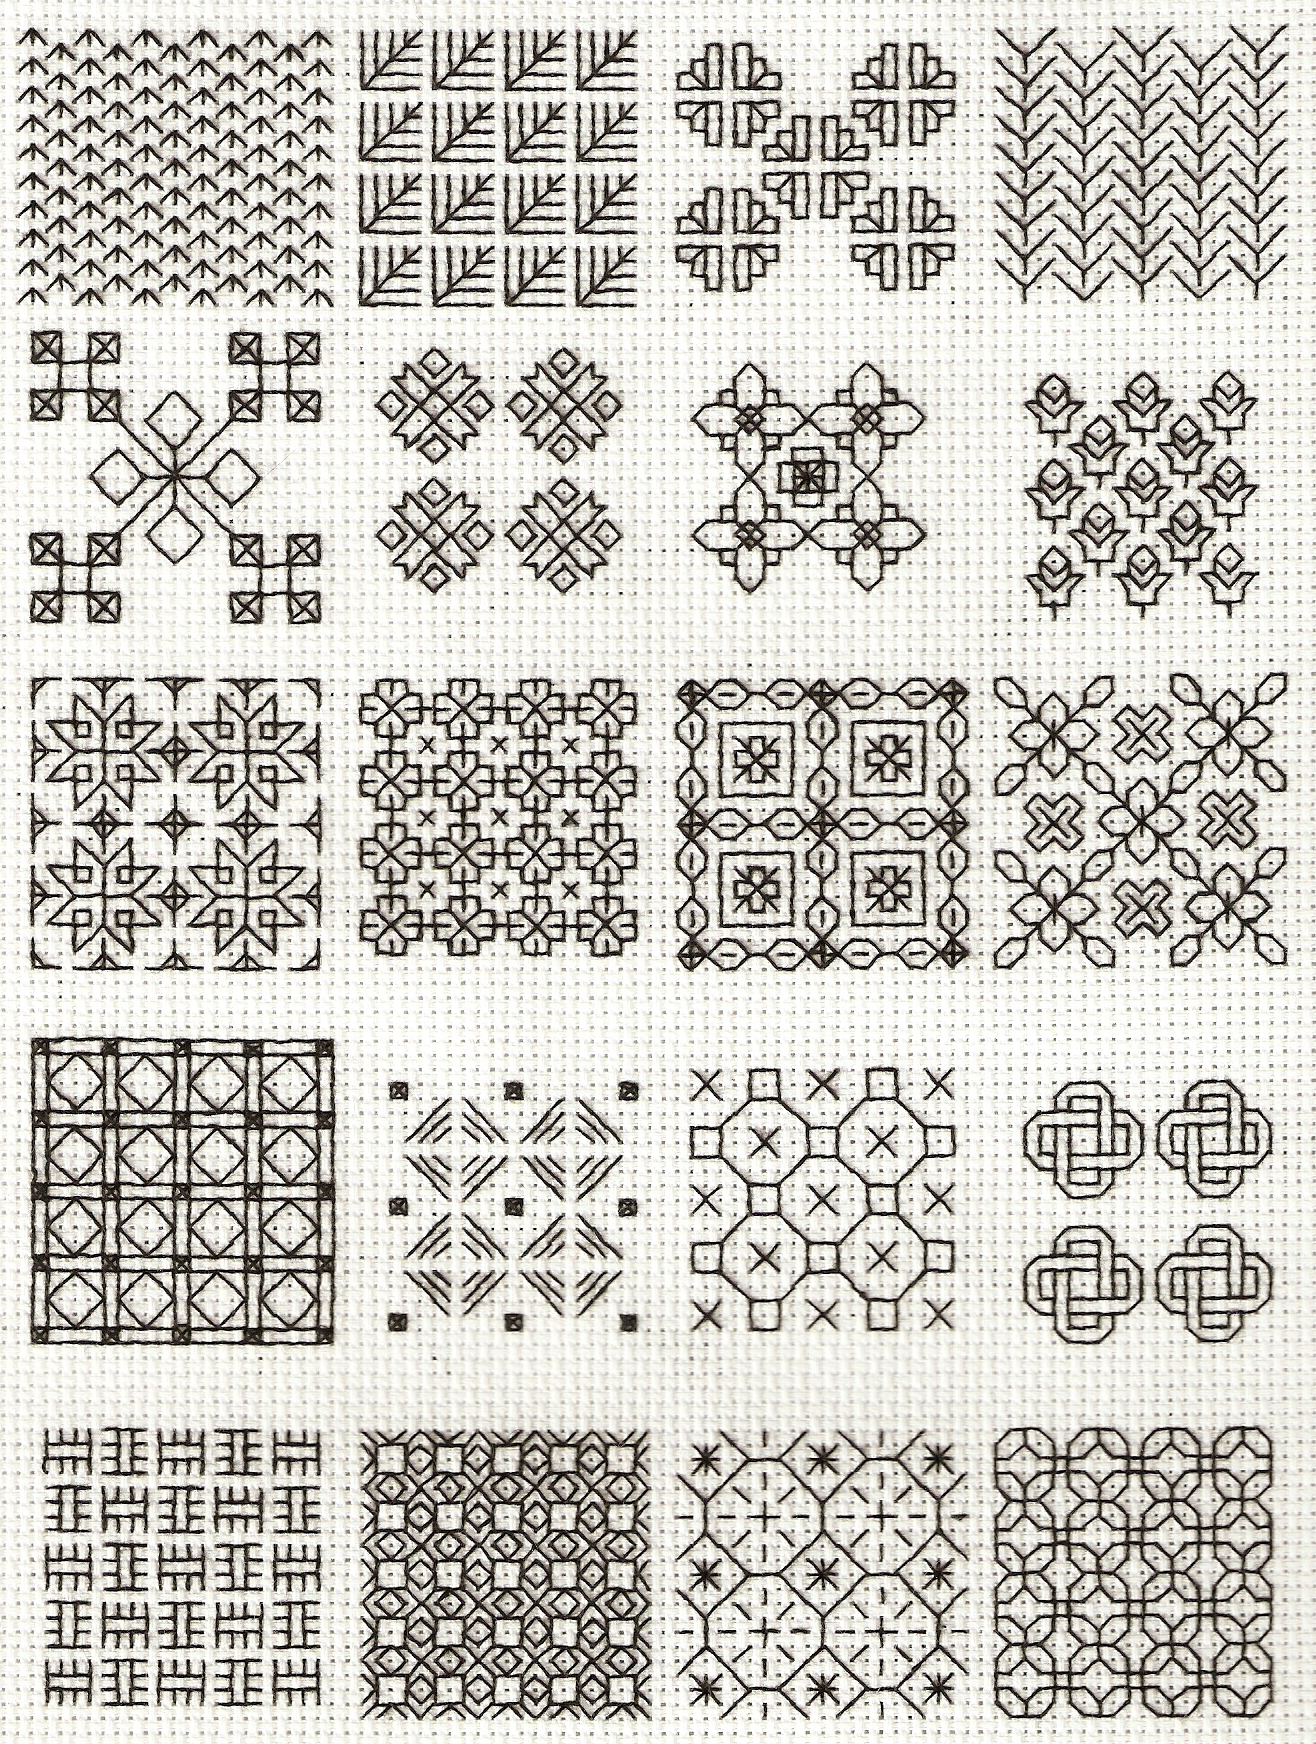
After finishing the two fill-in samplers from Beginner’s Guide to Blackwork I decided to press onward in my self-education.
Here are my attempts:
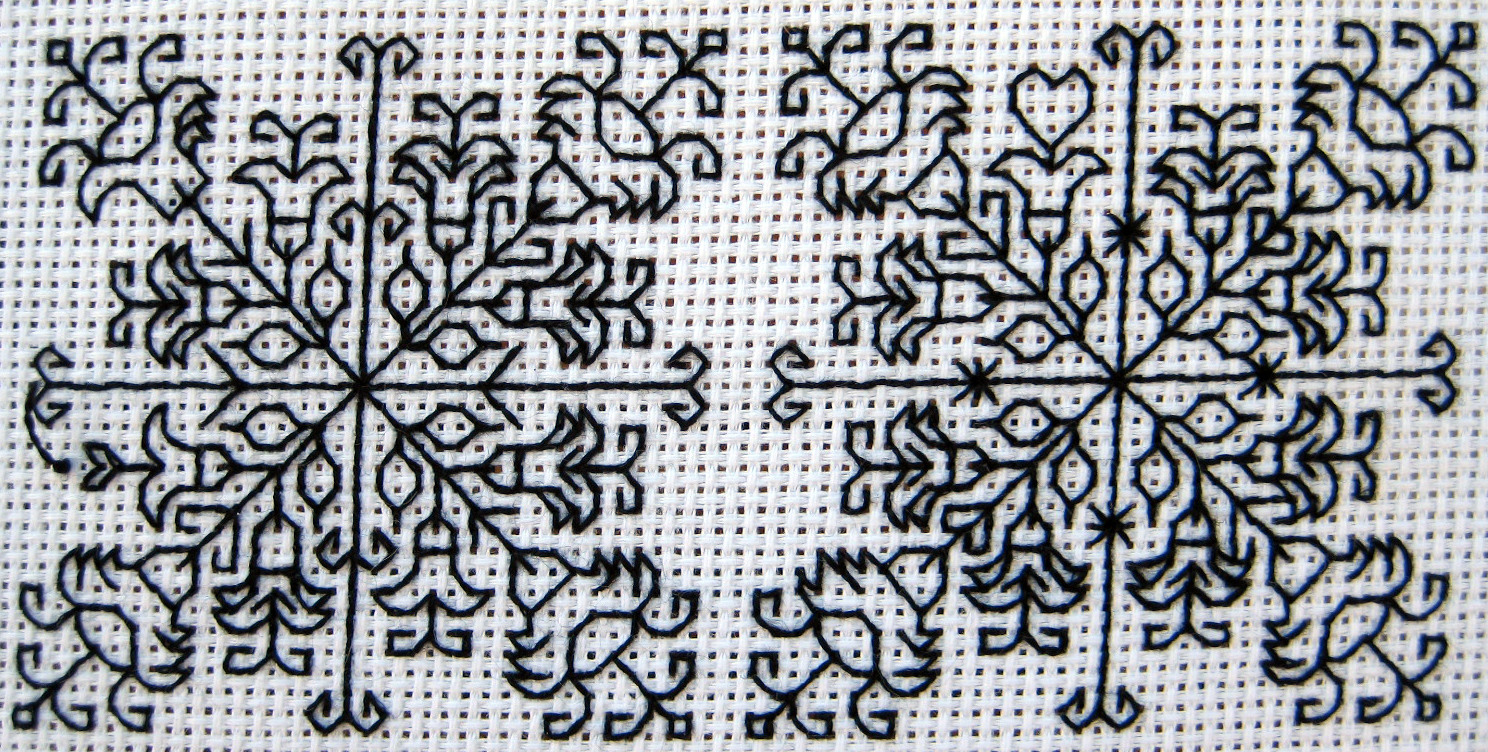
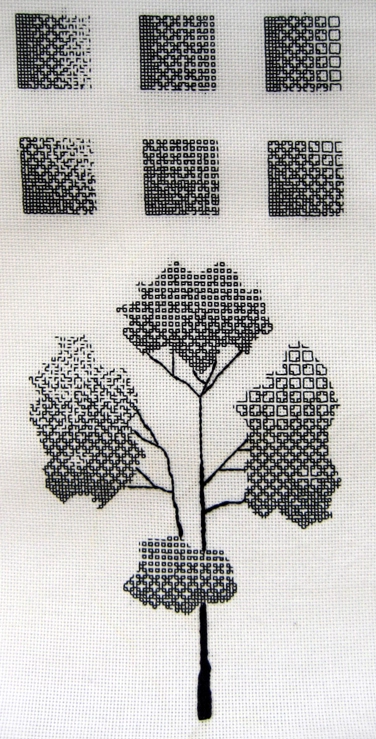 This was my first attempt at manipulating blackwork patterns. I was so ridiculously proud of myself. Here’s a detail of the top portion of the sampler.
Each column contains a different interpretation of the same fill-in pattern.
The first row in each column has a horizontal, left-to-right gradient, while the bottom row in each column has a diagonal, bottom left-to-top right gradient.
Before I began I charted each variation of the pattern on graph paper.
I think of the first variation as a degradation of the original pattern. It begins as an almost solid fill, moves into the pattern and then parts of the pattern drop out until something like seed stitches are left. Everyone I’ve asked so far likes this one the best and considers it the most effective. I’m wondering what other stitchers will think.
The other two patterns move from solid fills into the original pattern and then into at least two other patterns. I was ridiculously proud of this as well.
I learned that there can’t be an abrupt shift from one pattern to another, or from solid pattern to seed stitching. I had to “blur” the edges by carrying the patterns further in some areas and letting it change earlier in others.
When I was a child, I took art classes for years at the local art museum and could wield a pastel or Prisma color with ease but it’s been years and needle and thread are completely different mediums.
It’s satisfying but frustrating having to plan every single stitch. There’s nothing zen or meditative about this kind of blackwork.
The tree is inspired by a design in 4000 Flower & Plant Motifs by Graham Leslie McCallum. The patterns in the top three areas correspond to the columns above them and the bottom little bunch is the middle pattern repeated because I felt like it. Here’s a detail of the tree.
Here’s my second attempt:
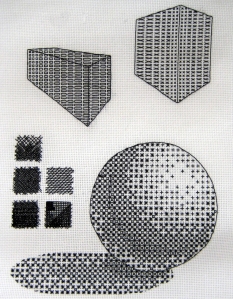
Perspective in blackwork! I decided after relearning shading, I’d go on to the next lesson in any Beginning Drawing class and relearn perspective in this medium.
I used really simple patterns for the boxes, x’s and squares so as to keep the project from spiraling out of control.
In the right, which was the first attempt, the pattern stretches away from the viewer. This is my favorite of the two because the optical illusion makes it appear as though the sides of the box curve in.
In the left box the pattern stretches towards the viewer. I don’t like this one as much though that may be because I rushed it and stitched over four blocks of aida for three columns and that was just too much. I’m not sure either are effective at communicating perspective, though I guess I shouldn’t expect realism. I’m glad I stitched them up and can look back at these and apply what I’ve learned to future projects.
I wasn’t about to try a cone or a pyramid so the next test of perspective was a sphere. I spent a lot of time on this (be sure to click on the image to enlarge it, then click again to magnify it). I researched shadows and reflections and discarded a number of images before settling on this view. It was hard to know when to stop. I was constantly aware that it would be really easy to ruin it by overworking it.
Here’s a detail of the crosshatching I tested out:

I loved stitching this! I’d really like to use this to give a piece a “sketched” look. The left middle square is the best candidate I think. I’d want to practice some more to learn how to construct gradient with crosshatching but it’s such a great pattern.
The bottom two squares are my attempts to create a solid fill with crosshatching by stitching on both the x and y axis as well as both diagonals. It got a little cramped. I knew my needle should go in a general spot but I couldn’t be sure and the pattern just got too muddled. I don’t know if I would just use cross stitch or what for a solid fill. More practice is in order, obviously.
The topmost square and the right square in the middle row are a bit weird. I wanted to see what dropping out parts of the pattern would look like. I’m still not sure.
One thing I do know: it’s incredibly time consuming. These are stitched on 18 count aida and come in at just under an inch square. This pattern also consumes a ton of floss. I stitched this a while ago so I can’t remember exactly how much this sampler used up but that and the time factor were enough to make me give up for the time being. It’s definitely something I want to revisit though.
I don’t consider these samplers as finished products so neither should you but rather as sketches and opportunities to learn. I hope this was informative to you and you can apply it to your own stitching or was at the very least entertaining.
![IMG_0704[1]](https://backstitch.files.wordpress.com/2014/08/img_07041.jpg)
![IMG_0694[1]](https://backstitch.files.wordpress.com/2014/08/img_06941.jpg)


